Monday 27 December 2010

Collard Greens & Black Eyed Peas: The New Year Tradition

Collard Greens and Black Eyed Peas=
Happy New Year!!!??!!!


Many people, especially Southerners, usher in the new year by cooking black eyed peas and collard greens.

Growing up, my Grandmother was worn out around this time of year from cooking enormous Thanksgiving, Christmas and Sunday feasts, but she always made sure there was a huge pot of greens and black eyed peas simmering on the stove when New Years rolled around. (Can't forget that pan of cornbread! : )

I'm not exactly sure where or when the tradition originated. Even my online research comes up pretty unclear. According to scienceblogs.com:

"The source of the traditions isn't especially clear, and they haven't attracted much interest from researchers.

Some stories say the black-eyed peas became the South's salvation after Union troops destroyed other crops.
Others trace the peas themselves to Africa and speculate they made it here during the slave trade. Jewish people were eating black-eyed peas for good luck in their New Year's celebrations about 2,500 years ago.

Some traditions hold that the black-eyed peas represent coins, and collards can represent cash."


The latter explaination held true in my household growing up. The cooking of black eyed peas and collard greens represented blessings for a prosperous new year, not just financially but with health, business, family and whatever else your heart desired.

I have an friend who swears his good fortune comes from starting the year off with a prayer and a heeping bowl of collard greens and black eyed peas!

So whether or not you keep this tradition in your household, bringing in the New Year with this powerful duo may not be such a bad idea. Both foods pack major health benefits.

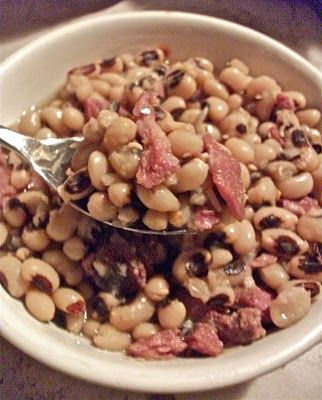
Black Eyed Peas are an excellent source of calcium & vitamin A, contains no cholesterole and are low in fat.

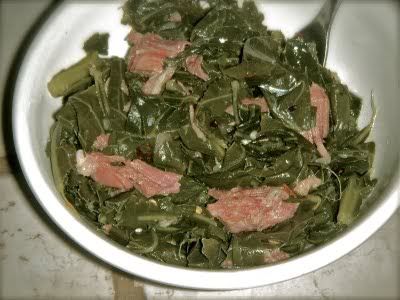
Collard Greens are one of the best sources of calcium, loaded with assorted vitamins and minerals, and tons of cancer fighting antioxidants.

Cooking Black Eyed Peas and Collard Greens

Collard greens and black eyed peas are really easy to make. Use seasonings to help bring out and enhance the flavor. Both dishes can be made super healthy by using water, olive oil & herbs or add a touch of southern flare by adding in savory ingredients like smoked meats, broths and seasoning salt. Below is how I usually prepare my collard greens and black eyed peas!


How to cook Collard Greens from start to finish! 

How to cook Black Eyed Peas from start to finish!


Do You Eat or Cook Collard Greens and Black Eyed Peas On New Years Day?


Here's to wishing you all a safe, blessed and prosperous New Year!!!

XO; )
Monique

Saturday 25 December 2010

Holiday Beef Brisket Recipe


For the last couple of years I've been making a crock-pot beef brisket recipe I found online for Christmas supper. It uses Good Seasons dressing mix, Au Jus mix, and canned beef broth, and it is very, very good (we love it). The problem is with my onion, garlic and tomato sensitivities, I usually get a rash after eating it, and I can't eat any of the leftovers. This year I decided enough is enough -- I was going to come up with a beef brisket recipe I can eat any time of the year and enjoy without any ill-effects. I slow roasted the brisket in the oven this time, with a sugar, salt, and pepper crust, and it turned out fantastic. The meat is so tender it just falls apart, and it is super flavorful with a nice crust on top. I also can't say enough good things about the gravy. It is perfect! This is our new holiday supper main dish going forward, and I can't wait to eat the leftovers in tacos next week!

Holiday Beef Brisket Recipe

4 lb beef brisket
2 tsp salt
2 tsp pepper
2 tbsp brown sugar

2 cups water
2 heaping tbsp unbleached flour (or any thickener you like)

Preheat oven to 335 degrees. Spray a 9x12 rectangular baking pan with non-stick cooking spray. Lay the brisket in the pan fat-side up (you can trim any excess fat from the bottom of the brisket if you want). In a small bowl, mix together the salt, pepper, and sugar until well combined. Sprinkle the mixture evenly over the top of the brisket and rub it in with your fingers to really coat the brisket. Cover the pan with aluminum foil and roast it in the oven for 3 hours. At the 3 hour mark, remove the aluminum foil and roast it uncovered for 1 more hour (4 hours total roasting time). When the time is up, remove it from the baking pan onto a cutting board, using a spatula to support it during the transfer, and cover it with aluminum foil. Let it rest for 15 minutes.

While the brisket is resting, pour all of the pan juices into a medium sauce pan over High heat. Mix the flour together with the 2 cups of water, using a small whisk to mix in the flour completely so there are no lumps, and add it to the sauce pan, stirring frequently. Heat the gravy to a boil, then reduce the heat to a simmer until the meat is done resting.

Slice the brisket against the grain and move it to your serving dish. Lay it out nicely like it was sliced (it will fall apart if not careful), using a spatula to help move it. Pour the gravy over the brisket. Serves 4-6 as a main course.

Thursday 23 December 2010

Pomegranate Martini


Pomegranate Martini

Do you LOVE cocktails??  Then chances are you will love this pomegranate martini recipe! And more so the vodka infused pomegranate seeds hiding at the bottom of the glass. (Such a fun little surprise!)

Matter of fact, I'm officially renaming this drink "my happy place" martini. It really does make you wanna sway back and forth while smiling and saying "wooooooo!! wooooo!!!" I SO get you Orpah!!

This ruby-red, festive cocktail is great for Christmas, New Years, Valentines Day or any holiday really! (or if you're the mother of a toddler and find yourself with a moment of me-time! Rare but it does happen trust me!)

The Cast Of Ingredients:
A cold, refreshing pomegranate martini is about to take place.

This pomegranate martini is sweet, tart, crisp and will have the room feeling "jolly with laughter" in no time! Not to mention pomegranate packs a healthy antioxidant punch so hey, it's a win-win in my book!

Talk about a cocktail that will sneak up on you!! Whew!! It's so easy to sip on this pomegranate martini throughout the evening without even noticing that it has a double shot of vodka hiding in there so be careful.
Chilled pomegranate seeds infused with vodka!

I've tried a lot of pomegranate martini recipes  since I've been on a major pomegranate kick lately, and this one is by far my favorite!!! (a combination of two recipes actually)

So if you're looking for a really good pomegranate martini recipe for your ladies night, festive holiday or just for a tasty treat for yourself, give this one a try!

Watch me make this pomegranate martini from start to finish!


INGREDIENTS: Serves 1
1 cup ice
1/2 pomegranate juice
1 oz of simple syrup *
2 oz. Vodka
1 oz- Triple Sec
splash of lemon juice (optional)
Garnish: Infused pomegranate seeds (optional)


NOTES:

To coat the rim of martini glass, wet the rim with lemon juice and dip the rim in a bowl of sugar.


*To make 1 oz of simple syrup, dissolve 1 tablespoon of sugar into 1 tablespoon of super hot water.


To infuse pomegranate seeds soak them for 12-24 hours in vodka. (in the refrigerator). I pop them into the freezer before serving to get them really chilled.


1 oz= 2 Tablespoons


Drink responsibly!


Sunday 19 December 2010

Candy Bar Hot Chocolate Recipe (Dove)

Candy bar hot chocolate recipe

Candy Bar Hot Chocolate 

Have you ever heard of candy bar hot chocolate? Well I'd almost forgotten about this nostalgic hot chocolate recipe. We'd make this all the time in HeadStart (yes, even though I'm 30 I can still remember being in HeadStart).

This has got to be one of the easiest, smoothest hot chocolate recipe I've ever had. Ok I know I've said that about this recipe and this one as well, but it's the huge flavor payoff that you get from such a simple recipe that has me loving this particular hot chocolate recipe.

With only 4 ingredients and one being your favorite chocolate candy bar, seriously, how can you go wrong!?! Just be sure to use a candy bar that boasts of being "silky". This will ensure a creamy, silky smooth, and comforting cup of hot chocolate.

No sugar is needed in this recipe when using milk chocolate. If you are using dark chocolate, you may want to sweeten it up a bit.

I LOVE DOVE!
I'm a DOVE girl myself! (No I didn't get paid to say that, matter of fact, Dove doesn't even know I exist) but to be such an inexpensive chocolate it is phenomenal! Silky, balanced sweetness, and so creamy! It rivals some of the imported chocolates I've tasted. So if you don't have a favorite chocolate, use Dove!

If you have little ones in your life, they'll enjoy being able to create their own custom hot chocolate. When I was little I liked using 3 musketeers. Yeah it was ridiculously sweet but there is no such thing when your little right?

CUSTOMIZE IT!
Don't feel limited to plain chocolate! There are tons of chocolate duos out there this time of year. My hubby loves to combines mint chocolate and dark chocolate. If you have little ones in your life, they'll enjoy being able to create their own custom hot chocolate. 3 musketeers anyone?

Watch me make this candy bar hot chocolate  recipe from start to finish!


INGREDIENTS
1 cup of whole milk
5-7 pieces of Dove Milk Chocolate or a serving size of your fav. chocolate bar
1/8 -1/4 teaspoons of vanilla extract
1 tablespoon of Vanilla Creamer
dash of salt (optional)
cool whip or marshmallows optional

Adjust the sweetness by add more milk or more chocolate!

Wednesday 15 December 2010

Taco Stuffed Pasta Shells


Taco Stuffed Pasta Shells

I have had this taco stuffed pasta shells recipe in my "stash" for so long. I don't remember what magazine I clipped it out of but the whole concept of a pasta taco was enough to get my attention.

These little taco stuffed pasata shells are like a party in your mouth! I like them better than tacos themselves! They could easily double as "out-of-this-world good" appetizers.

Hubby and I took a bite and we both said "wow...these are good" took another bite  "man these really are good!" lol I guess neither one of us were really prepared to like them this much. He demanded that I make these every week (not gonna happen).

I like these taco stuffed pasta shells because they are easy to make,  fun to eat, different, very easy to customize (they taste great with chicken too!), and crowd pleasing.

I completed my meal with some spanish rice and black beans (seasoned with onions, garlic, & cilantro) and a virgin margarita punch (recipe coming on New Years) It was an AMAZING meal! One where you just sit back after you are done and stare at your plate, completely loving what you just experience lol.

I hope that you enjoy this recipe just as much aswe did! "Taco stuffed pasta shells, welcome to my recipe collection!"


INGREDIENTS:
18-20 jumbo pasta shell (I always cook more for backup because some them break up)
2 Tablespoons butter
1 lb. ground beef or ground turkey (I used turkey)
4 oz cream cheese
1 teaspoon salt
2 teaspoons chili powder
1/2-3/4 cup green enchilada sauce
1 cup taco sauce (more if needed)
2 cup of Mexican Cheese Blend
Toppings of choice (ex: lettuce, tomatoes, black olives, sour cream)


Step 1: In a large pot, boil shells until al dente.
(look on back of the box to see how long to cook to reach the al dente texture.I always take off a minute or two from what the box stated. PLEASE DON'T OVERCOOK. Soggy, gummy shells are not good.)


Step 2:  Gently drain the shells.


Step 3: Return shells to pot and toss with 1-2 tablespoons of butter.


Step 4.) Brown the meat over medium-high heat.


Step 5: Add in  cream cheese


Step 6: Add in salt


 Step 7: Add in some chili powder

 
 Step 8:Stir  over medium heat until cream cheese has melted


Step 9: Spread Green Enchilada sauce on the bottom of 9 x13 inch pan. 


Step 10: Stuff the shells with the meat mixture 
(leave room for all those yummy toppings!)


 Step 11: Place the stuffed shells in the pan


Step 12: Pour taco sauce all over the shells 
(I only did a few shells in the photo because I wasn't sure I'd like it,
but it made it taste fab! So don't be shy with the taco sauce!


Step 13: Sprinkle on the cheese


Step 14: Bake in a 350 degree preheated oven for 10-15 minutes or until cheese has melted.


 Step 15: Cut up and prepare all of your toppings


 Step 16 : Top the Taco Stuffed Pasta Shells!


Dig In!!!

Monday 13 December 2010

Homemade Baking Spray (Pan Release Spray)

Non Stick Homemade Baking Spray. "Just Spread It On"
Non Stick Homemade Baking Spray Recipe (Pan Release Spread)


I've never really thought about making my own non-stick baking spray recipe. As much as I hate greasing and flouring my pans before baking or running out of that Bakers Joy stuff, you'd think I'd looked into it by now!

Thanks to my fabulous professional baker subbie Janelle, who sent me this wonderful recipe for non stick homemade baking spray (pan release spray.) It's what she uses in her bakery and I'm so thankful that she was kind enough to share this recipe with me.

I can not tell you how much I love this homemade baking spray. It's the whole greasing and flouring all in one! Simply brush it onto the pan and pour your batter into the pan. Done!! 

 It works great, better than the stuff in stores I must say. Not mention it last for so long, is so easy to make, and saves me money! "Just be sure to grease it generously" is what Janelle told me. I've yet to have a cake, cookie, muffin or bread stick to the pan since using this stuff. 

Watch me make this non stick homemade baking spray recipe (pan release spray) from start to finish!


INGREDIENTS
1/2 cup vegetable oil
1/2 cup all-purpose flour
1/2 cup crisco

New to baking? Try out this easy zucchini bread recipe! And don't forget to use this non stick homemade baking spray!!

Sunday 12 December 2010

How To Eat Pomegranate


How To Eat A Pomegranate
(without looking like you've committed a mass murder)

So last year I was tired of being a pom-virgin. I wanted to know what all the hype was about. Whenever I told people I'd never had a pomegranate before you'd think I'd announced some atrocious act with the shocked looks I received. I mean seriously, is it really that serious people?

"How the hell do you open these things!?!" Is the first thing I said when I purchased my first pomegranate. I was trying to peel it, then I tried slicing it. Needless to say juice got everywhere! Then I wasn't exactly sure how to eat a pomegranate or what on the pomegranate I was suppose to eat. This thing did nothing but stain everything and get me pissed off. Those lil seeds must really be worth it!

Surely I don't eat the seeds? Do I eat that white stuff? I swear I could have been on a comedy show because I was struggling hard in that kitchen. Common sense should have told me to go look online or ask somebody just how to eat a pomegranate. (Ughh that stubburn Taurus bull in me!)

Anyway, I studied up on the fruit before attempting to eat it again and now I must say I'm in love!!! I feel so "Goddess- like" and healthy when I'm eating pomegranates. I love pomegranates so much now and if pineapples don't watch out, these lil seeds are well on their way to becoming my favorite fruit.

There is just some fun about popping those sweet, tart, crunchy little seeds into my mouth. Not to mention the slew of health benefits that come along with these babies. I've convince my toddler that they are magical candy jewels (Good one, huh? )

If you've ever wondered how to eat a pomegranate then this helpful video I made hopefully will give you some insight and save you the nightmare I had in the kitchen when I was pom-virgin.

How To Eat A Pomegranate & Some Other Pomegranate Stuff


Baked Salmon with Apricot Glaze Recipe


We love baked salmon. I came up with this recipe because I wanted a slightly sweet glaze over the salmon, but wanted to stay away from soy sauce and teriyaki-type glazes. Apricot jam fits the bill perfectly and gives this moist salmon a really nice, not-too-sweet flavor, that compliments the fish perfectly. We love this salmon!

Baked Salmon with Apricot Glaze Recipe

1-1/2 to 1-3/4 lb fresh Salmon fillet with skin on
1/4 cup Smuckers Simply Fruit Apricot Spreadable Fruit jam
1 tbsp water
Salt and pepper

Spray a 9x12 baking pan, or a cookie sheet, with non-stick cooking spray and lay the salmon fillet on it. In a small bowl, combine the apricot jam with the water and mix it thoroughly. Use a pastry brush to spread the apricot glaze evenly over the salmon. Cover the pan with plastic wrap and put it in the refrigerator for 30 minutes or more before baking.

Preheat oven to 400 degrees. Take the salmon out of the refrigerator to come to room temperature while the oven is heating up. When the oven is ready, remove the plastic wrap, salt and pepper the salmon to taste, and bake the salmon, uncovered, for 15-20 minutes. Serves 4-6 people.

Wednesday 8 December 2010

Chocolate Peppermint Cupcakes


Chocolate Peppermint Cupcakes

My sister made these chocolate peppermint cupcakes in a mini version for a baby shower this past weekend and I fell in love. I'm not really one to go gaga over minty flavored desserts or candy but there is just something about the intense chocolate of this cake recipe paired up with the cool, crunch of the peppermint that just sends me over the edge.

I just couldn't stop eating these things. The fact that this recipe uses cool whip instead of frosting makes it even easier to down one after the other.  She got the recipe from a Kraft magazine but I replaced the box cake with a scrumptious, moist homemade devils food cake and it made a perfect recipe even better in my opinion.

These chocolate peppermint cupcakes looks so festive around Christmas time, like something straight from a professional bakery. I think these would be great to take into work as a lil treat for the co-workers (if they deserve it) or to a school Christmas party.

They are easy, quick, festive and best of all, a great pairing of flavors and textures.

Watch me make these Chocolate Peppermint Cupcakes from start to finish!

Chocolate Peppermint Cupcakes

INGREDIENTS:
2 cups all purpose flour
1 teaspoon salt
1 teaspoon baking powder
2 teaspoons baking soda
3/4 cup unsweetened cocoa powder
2 cups sugar
1 cup vegetable oil
1 cup hot coffee
1 cup milk
2 large eggs
1 teaspoon vanilla
8 oz cool whip
3/4 cup semi-sweet chocolate chips (plus more for melting and drizzling over cool whip
6-7 candy canes, crushed


Preheat oven to 325. Bake cupcakes for 15-20 minutes. Do Not Overbake. The center of cupcakes will spring back when touched when they are done.


Notes:
Crush the candy canes into bits. If you leave them in large chunks they will sink to the bottom of the cupcake while baking and make the bottom of the cupcakes stick to the paper. The candy canes will melt while baking


The cupcakes will not have a coffee taste. The coffee just kicks up the flavor of the chocolate. I always add coffee to my baked chocolate desserts to enhance the chocolate flavor. Yum!


Wanna Use A Boxed Cake Instead? Follow this recipe for super moist results:
1 pkg. devils food cake mix
1 pkg. (3.9 oz.) JELL-O Chocolate Instant Pudding
1 cup Sour Cream
1/2 cup oil
1/2 cup  water
4 eggs

"Kid-Tested Mother Approved" Giveaway

Giveaway TIME!!!!
For my email subscribers only!!


Winning Comment #62!
Congrats mixprincess4life!!
Please email me your shipping address!!


Thank you to everyone who participated!!!
More contests coming up!


Kid-Tested Mother Approved Prize Pack

Here's what you get:
~1 Box of Original Kix
~1 Box of Honey Kix
~24 piece counting theme floor puzzle
~Fun learn-to-count flashcards
~sippy cup
~portable snack container


Ahhh....Kix. This mother definitely approves!!!!

I could not wait to receive this prize pack because we are huge Kix fans in my house. As a child I can remember eating the original Kix with strawberry milk, yum!   Isaac has been eating Kix since he was 1 and his love for them (and chocolate milk) has never wavered. Pure toddler food! For some reason he likes to pretend  he's a dog and eat them off the floor. Kinda gross but I would totally do that too if I was a kid.(I kinda want to do it now) I heart the fact that they aren't loaded with a bunch of artificial crap and sugar like a lot of other cereals out there. I toss a container of Kix and a juice box into my bag and we are out the door!


To enter this contest simply answer below in the comment section:
What was/is your favorite childhood cereal?


Your comment order will count as your entry.

Winner selected by random.org on Dec. 15, 2010 

Be sure to check back on Dec. 15th to see if you won!!!


The products, prize pack, information and additional prize pack to give away were all given to me from Kix through MyBlogSpark.

Old El Pasa "Family Taco Night" Giveaway

Giveaway TIME!!!!
For my email subscriber only!!

Winning Comment #10
Congrats Kayotic!!!
Please email me your shipping address!


Thanks to everyone who participated!
More contests coming up!!!


Family Taco Night!!

Old El Paso "Family Taco Night" Prize Pack


Here's what you get:
~1 packet of original Old El Paso Taco Seasoning
~Cactus Chip & Dip Serving dish
~A set of 3 Fiesta Chili Pepper serving dishes 
~$10 gift card to purchase your taco fixings.


I am a sucker for creating family traditions so when I recieved this package and was told to have a "family taco night" I was all over it!!!  I love this idea! Well, actually I love any type of family tradition that involves FOOD!! As soon as I got this package I made taco pasta shells that evening since it was on a Friday (video recipe coming this week) I'd been wanting to try this recipe for so long. Well they turned out omg fabulous! Yep, the recipe went into my book of "make again" dinners. Even my mexican food loving husband said "why have you been keeping these from me for so long!?"  It was our first time having taco night but we will definitely be doing it often.

To enter this contest answer the question below:

What is your favorite Mexican dish that you would serve on family taco night???


Your comment order will count as your entry.

Winner selected by random.org on Dec. 15, 2010 

Be sure to check back on Dec. 15th to see if you won!!!


The products, prize pack, information and additional prize pack to give away were all given to me from Ol El Paso through MyBlogSpark.

Date Night Prize Pack

CONTEST TIME!!!!
For my email subscriber only!!


Winning Comment #99!!!
Congrats Loray!!
Please send me your shipping address!


Thank you to EVERYONE who comments!
More contests coming soon!


Date Night Prize Pack

Wanchai Ferry Macaroni Grill Boxed Dinner Giveaway!!


Here's what you get:
~ $25 Visa GIft Card
~Romano's Macaroni Grill Creamy Basil, Parmesan & Chicken Dinner Kit
~Wanchai Ferry Orange Chicken Dinner Kit


Do you remember your first date with your significant other?

The first date I had with my husband was at this Italian Restaurant in 2001. I can't remember the name but it's no longer in business anyway.  I was still on that "new relationship high" so everything was picture perfect in my eyes. We could have had lunch in a junkyard and I would have still swooned at his creativity. (yep I had it pretty bad) We had our fair share of packaged dinners as well, because I think I only cooked him one meal the entire 2 years that we dated. (tip# never show a man ALL the skills you are working with ; )

My review on the Date Night Prize Pack: 
I really enjoyed both of the dinner meals but I we all (hubby, baby, and I) liked the Wanchai orange chicken dinner the best!! Set this dinner out on some classy square black plates and you have an elegant looking meal that tastes nothing like it came from a box. I didn't even have to add any additional things to it like I normally do when I make boxed dinners. I used the $25 gift card to by drink, dessert and some lipgloss (hey yall know how I am about lip gloss) Overall it was a great meal: quick, easy, and tasty! Will make again!

To enter this contest:
Tell me where you and your honey had your first date???????


Your comment order will count as your entry.

Winner selected by random.org on Dec. 15, 2010 

Be sure to check back on Dec. 15th to see if you won!!!


The products, prize pack, information and additional prize pack to give away were all given to me from Wanchai Ferry and Macaroni Grill through MyBlogSpark.

Monday 6 December 2010

Mailing Baked Goods: Tips For A Smooth Delivery


"Mailing baked goods doesn't have to be complicated"

Mailing baked goods can be a heart warming gift, provided they are shipped promptly and correctly. Nobody wants to receive stale, melted chocolate chips cookies or  a box of dry crumbs that should have been a pound cake.  Here are a few tips and tricks for mailing  baked goods to ensure they arrive fresh and intact!

Mailing Baked Goods: What Baked Goods Ships The Best:
Although you may desire to send fancy glazed or frosted goodies, save yourself the risk and just say no, or at least say no to shipping them in the warmer months. (If your creations just must have frosting, try shipping it in a separate container so that the recipient can add the frosting when it arrives.) Most frosting need to be kept cool to prevent melting or becoming sticky. Frosting and glazes can also make cakes or cookies soggy while in transit if not kept at adequate temperature. Below are a few baked good that ships wonderfully without such a high risk of being ruin. When mailing baked goods,  try to focus on items that are hearty and sturdy as opposed to ones that are extremely delicate and complex.
When To Bake & Ship:
Bake and ship your goodies the same day that you make them. Allow them to cool completely before packaging. When mailing baked goods, Priority Mail is usually sufficient. Priority mails generally takes 2-3 days if mailed in the U.S. Use next day delivery for optimum freshness. Although this delivery option will be more expensive it can give you piece of mind of knowing that your baked goods will arrive tasting fresh.

How To Package Baked Goods For Shipping
Always pack your goodies in airtight containers or airtight bags. When packing your baked goods never pack several types of treats in the same container. Every type of cookie, cake, or candy should be packed with it's own kind and wrapped individually. For example, if you are packing pound cake, oatmeal cookies, and brownies. You will need to wrap each slice of pound cake individually and place into a sturdy container that will consist of only pound cake . Do the same for each oatmeal cookie and brownies.  Do not package soft cookies with crisp cookies.
  • Wrapping cookies- Cookies can be placed back to back and wrapped securely in plastic wrap. Place a piece of wax paper in between the cookies to prevent sticking. Place each cookie pair in a separate plastic bag.  Nestle the cookies securely in a container, ensuring they can not move around if shook. If the cookies are decorated wrap them individually.
  • Wrapping bars and candy- Bars and candy are best shipped in containers, used wax paper to separate the layers. A decorative tin container works well and will keep them protected.
  • Wrapping quick breads and cake- Wrap each slice in plastic wrap and place into a container. Make sure that they can not shift around if moved.
Completely cushion the bottom, sides and top of the box with bubble wrap, newspaper or packing peanuts. Fill in any gaps between the containers as well. Everything should be pack tightly and securely. You should not be able to hear or feel the items shifting around in the box when you shake it.

When Mailing Baked Goods Make Sure That:

  1. The package is clearly marked that it is "PERISHABLE.  Normally your courier will ask if your package contains perishable goods and place a sticker on it if it does.
  2. Make sure that the recipient knows that you are sending perishable goods and that they will be home to accept the delivery.
  3. Double check that the recipient's address and your address is written correctly and is affixed securely to the package. The package should be taped very securely as well.

Mailing Baked Goods & Enhancing The Presentation:

Just because food gifts have to be carefully packaged doesn't mean they can't look festive.
  • Try placing your wrapped and packaged baked goods in a decorative tins, themed gift bags or wrapping in shimmering cellophane.  Use curling ribbon and stickers to enhance the packing bags and containers
  • A baking cookbook can make a great gift to compliment a box full of goodies or even just attaching a recipe card to each item so that the recipient can make them themselves.
  • Placing fun, themed stickers all over the outside of the box is sure to bring a smile on the recipients face before they even open the package.
Wanna give a dose of homemade comfort to the ones you love from afar? It could be as easy as mailing baked goods.

Saturday 20 November 2010

Buttermilk Chicken Turkey Brine Recipe


Buttermilk Brine For Chicken & Turkey

The sentence of the day: ALWAYS soak (brine) your whole chicken and whole turkey before cooking!

I heart this buttermilk brine SO FREAKIN MUCH!!! If you have never brined whole chicken or turkey before then trust me, you will want to start.

A brine is simply a mixture of ingredients that you soak your meat in prior to cooking. There are dry brines and wet brines.  I like wet brines better.  Brines can add flavor to the meat depending on what spices you add, but most importantly it makes the meat super juicy and tender. 

Many people brine their whole poultry using salted water or broth (since it's cheaper) but I always prefer good ol buttermilk. (It's only like $3-$4 a gallon and so worth it IMO) Apple juice is also a very popular liquid to brine in. I think buttermilk makes the absolute best brine for chicken and turkey. Not only does it add richness to the meat but it naturally tenderizes it to fall-off-the-bone perfection. 

So here is one of my all time favorite brines to use on Thanksgiving turkeys. It creates a bird that is ridiculously moist and juicy and has a subtle seasoned taste that doesn't overpower the natural taste of the meat which means it pairs up great with just about any gravy or dressing. 

Don't let the hot sauce in this brine recipe scare you. Your bird WON'T come out tasting anything like hot sauce.

I always make gravy to go along with my turkey but honestly, you really don't need it. Yes, it makes poultry THAT moist! Just PLEASE don't overcook your bird!!!!! When I first made this brine and cooked my turkey, I went to grab off the leg and the only thing I was left holding was the bone LOL. All the meat had slide right off! And the breast, omg talk about JUICY!

I hope that you enjoy this brine just as much as I do!

Watch me make this buttermilk brine from start to finish

Ingredients (for 5 lb bird) (double the recipe as needed)
4 cups buttermilk
3 tablespoons KOSHER salt
1 tablespoon crushed, fresh black pepper
2 tablespoons poultry seasoning
3 tablespoons hot sauce
1/2  onion, chopped
2 garlic cloves, chopped

BRINE THE BIRD FOR 8 to 12 hours 
(I sometimes go longer)


MY WHOLE CHICKEN AND TURKEY ROASTING TIPS:

*I like to stuff my chicken & turkey with chopped green apples, onions and garlic. It adds moisture and a hint of great flavor.(discard after roasting)
* Follow the directions on your bird for cooking. Remember that the bird will continue to cook when removed from the oven so keep that in mind.
*Allow the bird to rest for a few minutes before carving to let all the juices settle.
*I always roast my bird, breast side down.
*I usually broil my bird for a few minutes before it's done to create a crunchy-like skin.
*Basting really isn't needed but sometimes I pour a few cups of chicken broth in the bottom of the roasting pan to baste my bird with. And it makes a flavorful gravy.
* I ALWAYS butter my chicken generously under and on top of the skin before roasting. And sprinkle with desired seasonings.

Tuesday 16 November 2010

Southern Pecan Pie Recipe


Southern Pecan Pie AKA Ova' Yonda Pecan Pie

Pecan pie is such a simple pie to make yet so many people seem to struggle with getting the right balance of sweetness, the perfect firm, yet soft texture and the right nut-to-filling ratio. Yep, sometimes the easiest recipes can be a pain in the ass!

This homemade pecan pie recipe (with a few personal alterations) has been in our family for as long as I can remember. It's a trusty old standby that hasn't let me down yet. When newbies to the family taste it for the first time it gets a lot of "now that's a pecan pie!" remarks. This recipe gets passed around a lot during the holidays and somewhere got the name "Ova Yonda Pecan Pie".  I've tried other pecan pies and this one continues to be my favorite. Easy, pure comfort.

What I love about this pecan pie recipe is that it starts with a flavorful, homemade crust that goes so well with pecan pies. The filling sets to perfection with a sweetly balanced caramel vanilla flavor. The toasted pecans are crunchy (none of those chewy pecans here!) It's just a simple, well-balanced pecan pie.

Watch me make this fabulous southern pecan pie from start to finish


Preheat oven to 350 degrees
INGREDIENT
1 pie crust shell (click here for my pie crust recipe)
1/2 cup of light corn syrup
1/2 cup dark corn syrup
1/2 cup white sugar
1/2 cup dark brown sugar
1/8 teaspoon salt
1 teaspoon Mexican vanilla blend
1 Tablespoon  flour
1/4 cup butter, melted
3 eggs
1- 1 1/2 cups chopped pecans, toasted

Note* How to toast pecans for pecan pie: Spray a cookie sheet generously with cooking spray. Spread the pecans into a single layer. Bake in a preheated 350 degree oven for about 5 minutes or  just until you are able to smell the pecans aroma. Be careful not the burn them. Yuck!

Note*The pie will be slightly jiggly when removed from the oven. I usually cook for 45 minutes and the filling is soft and set when completely cooled.  Let the pie set before cutting.  I don't cut the pie until it's completely cooled and set. (personal preference)

Note*You can also mix the pecans in the batter. When putting them on the top like I do, the pie may puff up while baking.  It will fall and settle as it cools so don't be alarmed.

Note*If the crust starts to get too brown, you can cover the edges of the crust with foil. I never do this when I'm using the recipe for the homemade pie crust listed above.

Note*Oh yeah, you can also use whole pecans if you'd like. I can't use them because for some reason they remind me of bugs and makes my skin crawl (don't ask. I told you I was weird) And it's easier to cut!

Here is the Mexican vanilla blend extract I used. I got it from Wal-mart and I LOVE this stuff!!!


Monday 15 November 2010

Southern Cabbage Recipe


Grandma's Southern Cabbage
REQUESTED RECIPE: How I make my cabbage
Note* If you are making this for a special occasion, definitely make it the day before and just reheat it in the microwave. It taste great the day you make it, but once it's had a chance to soak up those flavorful juices. OMG delish!!!

I usually cook cabbage about once or twice a year. I don't know why because I love the stuff, it's healthy and even better, it's cheap!

Wait a minute I know why I don't cook it as often, because it funks up the kitchen! Ughhh, there is just something about the smell of cabbage cooking that I hate. That was until a friend gave me a lil tip:

"Don't boil the cabbage, simmer it!"

Some folks say that if you add in a bit of vinegar or lemon juice while cooking, it will greatly reduce the smell. Hmmm...I'll have to give it a try one day.

My mother always boiled her cabbage from start to finish and so I just automatically did the same thing. Simmering it really does cut down on the smell. Keyword: Cut down. Not get rid of. I can at least tolerate it now.

Here is how I cook my basic cabbage. I love this southern cabbage recipe because it creates tender, yet slightly firm cabbage that is full of flavor, even the juice left in the pot taste good!

This is a very basic (but flavorful) cabbage recipe. If you wanna add a lil spunk to your cabbage throw in some sauteed onions, garlic, red pepper flakes, and smoked meat. Yum! 


Watch me make this tasty southern cabbage recipe from start to finish! 


INGREDIENTS:
1 head of cabbage
2 Tablespoons butter
2 Tablespoons olive oil
1/2 teaspoon salt
1/2 teaspoon of seasoning salt (or season to taste)
Fresh black pepper
1 1/2- 2 cups chicken broth (can also use water but chicken broth makes it taste so delish!)