Monday 31 January 2011

Getting Ready for the Storm of the Decade

Photo (c) Flickr User kkrisus
I arrived at my mom's this morning after a tiring, but uneventful red-eye flight from San Francisco. Unfortunately, it seems as though a massive blizzard is headed our way, and it looks very likely my drive down to the QVC training will be iced out.

As anyone from these parts will tell you, rain is no problem, snow is no problem, but an ice storm is another thing altogether. Freezing rain collects on trees and power lines, causing catastrophic damage as gravity and Murphy's Law do their thing. Not to mention that when it comes driving surfaces, a sheet of black ice really sucks.

I hear the blizzard will slam 2/3rds of the country over the next 3 days, so if you're in its frigid path, please be careful! In happier news, I'll be attempting to film a Super Bowl-themed clam casino dip recipe tomorrow. Stay warm and stay tuned!

Sunday 30 January 2011

Fresh & Easy Guacamole

Info PR: 3 I: 45,500,000 L: 0 LD: 191,612,348 I: 254,000Rank: 7 Age: Oct 12, 1999 I: 0 whoissourceRobo: yesSitemap: no Rank: 1013 Price: 5626072 Density

Chunky-Style Guacamole

Fresh & Easy Guacamole 

Give me some creamy, chunky, authentic guacamole made with fresh ingredients and you will have a happy diva on your hands!

My love for guacamole took a few years to develop. I don't know why I didn't like it for so long, but I'm glad my taste buds finally got with the program. I love everything about guacamole even the beautiful green color (hmm...i wonder how my living room would look painted guacamole green... with bright white trim...hmmm?)

Easy guacamole starts with fresh, authentic ingredients

This fresh & easy guacamole recipe is one of my favorites! It packs in those authentic ingredients and tons of flavor.  Good thing it is so quick to whip up!  Serve it with chips, on tacos, whatever you can think of.... guacamole deviled eggs anyone??
Homemade Guacamole: Just add some chip for an easy appetizer!

Watch me make this fresh & easy guacamole recipe from start to finish!


Ingredients: (serves 4)
4 avocados (they should be firm to the touch but not hard or mushy)
Juice of 1/2 lime
1 clove of garlic, minced
1/4 onion, minced
1 medium tomato, chopped
1/2 jalapeno, minced
Fresh cilantro
salt & pepper, to taste

Saturday 29 January 2011

Heading Home to See Mom, and Eventually Cook with David

Photo (c) west-chester.com
I'll be grabbing a red-eye Sunday night for snowy Western New York, to spend a couple weeks visiting with my mother, Pauline, and the rest of the family. But wait, that's not all! While I'm home, I'll be driving down to West Chester, PA, to the QVC Studios to train for a future appearance to help promote the cookbook I did for Parragon Publishing (read about that here, if you're not already in the know).

Before they let you on the largest home shopping network going, you have to do a day of training to learn all the finer points of shilling, telling people that operators are standing by, and how they can afford the book by breaking up the payments into smaller, more manageable installments.

If everything goes well, I'll be appearing on the wildly popular, In The Kitchen with David. I've never seen the show, but I found this video on fellow celebrity blogger, Hungry Girl's YouTube channel. Have a great weekend, stay tuned, and enjoy!


Friday 28 January 2011

Honey-Brined, Southern-Fried Chicken Breasts – Boneless, Skinless, Low-Fat, and Delicious?

Is there anything less inspiring than a boneless-skinless chicken breast? There must be, but for the sake of this post, let's say there's not. So, how do we turn this culinary snoozer into something worthwhile? Fry it. Hey, that was easy.
Of course, the problem here is there's no flavorful skin on which to attach a crunchy coating. To add insult to injury, the fatty skin also protects the bland breast from drying out. Despite these obvious issues I decided to attempt Southern-fried boneless-skinless chicken breasts anyway.

As fate would have it, the same day I bought the chicken, Alton Br
own was doing a honey-brined pork shoulder on Good Eats. To combat the dreaded dry chicken I decided to use a simplified variation to soak my breasts.I won't bore you with all the scientific details, but through osmosis, brining raises the internal temperature at which the moisture is forced out of a protein. Even though I only brined my breasts for an hour, it worked like a charm. As you'll see in the recipe video, the meat was very juicy.As far as the skinless-coating went, I was also pleasantly surprised. Even though it was incredibly thin, it stayed on the meat throughout the frying, and the final result was nothing short of quite good.And yes, I am calling this low-fat (relative to regular Southern-fried chicken). When you eliminate the skin, you significantly reduce the calorie count, and even though we're cooking this is lots of oil, the coating is too thin to absorb very much of it.

If frying isn't your thing, still I encourage you to give this ultra-simple brine a try anyway. I think you will be impressed with its effect. I plan on using this on a regular basis this summer while rocking the grill. Enjoy!


Ingredients:
2 boneless-skinless chicken breasts
3 cups cold water
1/4 cup kosher salt
1/4 cup honey
1/4 cup buttermilk
1 cup flour
1/2 teaspoon salt
1/2 teaspoon garlic salt
1/2 teaspoon onion salt
1 teaspoon black pepper
lots of cayenne
vegetable oil for frying


View the complete recipe

Thursday 27 January 2011

Yellow Cake with Sugar Glaze Recipe (Vegan)


I love my yellow cake recipe. This is a wonderfully moist, flavorful cake that can be frosted any way you choose. We like this cake with sugar glaze on it in lieu of frosting. The combination of the cake and the glaze is fantastic.   The picture above has brown sugar glaze on the cake.

Yellow Cake with Sugar Glaze Recipe

For the cake:

2 cups unbleached flour
1 cup sugar
1 tsp baking powder
1/2 tsp salt

1 cup water
1/2 cup vegetable oil
1-1/2 tsp vanilla extract

Preheat oven to 400 degrees. Mix together dry ingredients. Add wet ingredients and mix together thoroughly, but don't over mix. Spray an 8x8 square baking pan with non-stick cooking spray. Pour the batter into the pan and bake it for 30 minutes. When the time is up, insert a toothpick into the middle of the cake to make sure it's done.

If using rice flour to make this cake use the following instead of the unbleached flour above:
1-1/4 cups brown rice flour
3/4 cup white rice flour
2 tbsp binder (potato starch, tapioca flour, arrowroot powder, etc.)
Plus 1/4 cup more water

When the cake comes out of the oven, start making the glaze.

For the glaze:

2/3 cup brown sugar or white sugar
1/4 cup water
Optional: 1/2 tsp flavoring extract

Combine the sugar and water in a small saucepan over Med. High heat. Stir constantly until the sugar melts and it starts to boil. The liquid will be transparent. Remove it from the heat (do not boil it) and pour the glaze evenly over the warm cake. Use a butter knife to gently pull the sides of the cake away from the pan so the glaze can go down the sides. Let the cake cool before cutting it.

Wednesday 26 January 2011

Cream Cheese Arepas and the Machine

When I first discovered arepas on a trip to New York City last year, it was love at first bite. I couldn't wait to get back to San Francisco, find some P.A.N. arepas flour, and make a batch or two, which I did in this post.

Since it was my first attempt, I used the classic water, salt, white cornmeal mix to delicious effect. As I read more about arepas, I saw there were hundreds of variations, using all sorts of combinations of milk, cheese, cream, buttermilk, yogurt, etc. I decided I wanted to try a breakfast version made with cream cheese and milk, topped with butter and honey. Unfortunately, I never did.

So, when my friends at Imusa asked me to test their arepas maker, I knew exactly which recipe I'd try. As you'll see, this machine was very easy to use, and produced some fine arepas (even though my dough was a tad dry and cracked a little – and to paraphrase the great Whitney Houston, when it comes to arepas perfection, cracks are wack).
If you don't use a specially made grill for these, worry not; they would come out fine using a pan as I did in the original video. If you want more info about this particular model arepas maker, please check out this Imusa product link. Also, if you can't find the P.A.N. arepas flour in a store near you, follow this link to purchase online.

On a side note; I have to admit, as I was using the machine, I kept daydreaming about doing burgers and eggs with it as well. So, don't be surprised if you see this machine appear in future videos with alternative recipes. Enjoy!

UPDATE! As viewer AFB just brilliantly pointed out, you can certainly just place your dough balls in the maker and let it press them down into patties for you. This is, of course, the main advantages of using this machine! I like the smoother edges hand-shaping provides, and I did make sure they were thicker than the press is deep, so that both sides are in contact. I may do an updated test to see how this faster and more traditional use of the press works.


Cream Cheese Arepas Ingredients (makes 4):
1/2 teaspoon salt
3/4 cup milk
1/4 cup softened cream cheese
1 tsp sugar
1 cup P.A.N. arepas flour


Note: This video was made possible by Imusa, and the arepas maker was provided free of charge to test.


View the complete recipe

Tuesday 25 January 2011

You Asked for It!

Remember when I posted the "Potato Ball in Potato Box" video, and you guys started joking around about deep frying it? Well, here you go! This was a YouTube video response from kashioable.

Banana Pudding Cupcakes


Banana Pudding Cupcakes

I love banana pudding. I love cupcakes. I see no reason why these two fitting citizens can't make a baby.  I present to you: Banana Pudding Cupcakes.

A french vanilla flavored cake with banana cream pudding mixed into the batter along with chunks of fresh bananas and crushed Nilla Wafers. No need to get fancy with the frosting, simply top with cool with and Nilla Wafers for all the comforting flavors of banana pudding in a cupcake form.

This is my latest concoction using that new PHILADELPHIA Cooking Creme that I was sent last month to sample. I used the original flavor in this banana pudding cupcake recipe and I'll have to say it's a keeper!

The cooking creme made these babies super moist and balanced out the flavors perfectly!  The cooking cremes (which come in four flavors) are already starting to hit the shelves so be on a lookout for them in your grocery store.

Watch me make these Banana Pudding Cupcakes from start to finish!


  • 1 box French Vanilla Cake Mix
  • 1 box Instant Banana Cream Pudding (3.4 oz)
  • 3 Eggs
  • 1/2 cup(s) of Vegetable Oil
  • 1/2 cup(s) of Water
  • 10 ounce(s) of PHILADELPHIA Original Cooking Creme
  • 1 cup(s) of Bananas, smashed
  • 2 cup(s) of Nilla Wafers, crushed (plus more for garnishing if desired)
  • 8 ounce(s) of Cool Whip
Steps
  1. In a large bowl, add in the first 6 ingredients.
  2. Mix until all of the ingredients are combined.
  3. Fold in the bananas and Nilla wafers.
  4. Line cupcake pans with cupcake baking papers.
  5. Spoon the batter into the cupcake baking papers (about 3/4 full)
  6. Place the cupcakes into a preheated 350 degree oven for 18-20 minutes.
  7. When cupcakes are done, remove them from the pan and place them on a baking sheet.
  8. Place them into the freezer to cool for 10 minutes.
  9. Garnish with Cool Whip and crushed Nilla Wafers.
  10. Serve cold.

Monday 24 January 2011

Stovetop "Sous Vide" Episode 2: NY Strip Steaks – Pretty and Pink

The duck breast we did in Episode 1 of our stovetop sous vide series last month was so spectacular, I couldn't wait to give it a try with some nice thick steaks. I had no doubt that it would work (thanks to the laws of physics), but would the extra time and attention be worth the payoff?

Well, that depends. As far as the taste and texture of the meat goes, it was pretty much the same as any perfectly cooked steak I've ever had. Not to sound all braggy, but thanks to having done thousands of them, I can produce a pretty decent, medium-rare NY Strip steak in
about 15 minutes.

It will be nicely browned and crusty outside, warm and pink in the middle. So for me personally, I'm not sure the extra wait is worth it purely for the textural advantages is provides. Don't get me wrong, the results were fabulous, but do I really need to wait 2 1/2 hours to get my beef on?
The real advantage to this technique is not a superior-quality final product (like it was for the duck), but the fact that you're guaranteeing a perfect medium-rare (using 130 degrees F. water, or 140 for medium, or 150 for medium-well, etc.). So, if you've never had any luck getting large, expensive hunks of steak cooked to your idea of perfection, then this is the way to go, for sure.

Since we went over the basics of this procedure in the previous post, I won't rewrite all the background info about what sous vide is, and how it works. For that kind of scintillating background information, please check out, "Episode 1: The Best Duck Breast Ever." Enjoy!

NOTE: For LOTS more information about doing sous vide steaks, check out Sous-Vide 101: Prime Steak Primer by J. Kenji Lopez-Alt, posted on Serious Eats.


Ingredients for Stovetop "Sous Vide" NY Strip Steaks:
2 (12-14 oz) NY Strip Steaks
1 teaspoon grape seed oil , or vegetable oil
2 tablespoons butter, divided
handful of trimmed mushrooms
salt and freshly ground black pepper to taste
1 clove garlic
1/2 teaspoon balsamic vinegar


View the complete recipe

Sunday 23 January 2011

What is the Opposite of Meatless Mondays?

This is "Meat Salad" from the YouTube channel, Epic Meal Time. I would LOVE to know what you think. Enjoy! UPDATE: We have an official Vegan response video below!


Saturday 22 January 2011

That's Some Sweet Pie Crust

This great pie crust video features Alan Carter, the pastry chef at Mission Beach Cafe, a great little neighborhood restaurant just a block away from our home in San Francisco. I've been planning on filming a new pie crust recipe, and have always wanted to try the vinegar/water method. 

Knowing that our neighbor, Chef Carter, known for his world-class pies, uses that same technique has me very excited to give this a try. The clip comes via The Feast, who credit Mike Anderson, from NBCBayArea.com, for the video's production. Enjoy!


View more news videos at: http://www.thefeast.com/video.

Thursday 20 January 2011

Spicy Orange Chicken Wings - It's Not a Party Until the Panda Wings Come Out!

Here they are – easy and delicious, spicy orange chicken wings, cleverly named (according to me anyway) after the spicy orange chicken served at Panda Express. By the way, this recipe has nothing to do with killing, riding, eating, rubbing, growing wings on, or otherwise abusing panda bears.

We are right smack in the middle of chicken wing eating season, and with the Super Bowl just around the corner (Go Jets!), I figured it was high time for a new wing fling. The recipe could not be simpler to make, and if you can somehow manage to whip up a batch of these oven-fried chicken wings to glaze, you'll be in sticky-finger-heaven.

Since this was my first time trying this, I went very basic, and was extremely happy with the results. It was very similar in taste and texture to the Panda orange glaze, and done so with no gloppy cornstarch, which is not very nice cold.

Next time I will try the additions of ginger and garlic, and maybe some toasted sesame seeds. In the meantime, I really hope you give these a try, and please let me know how your particular variations come out. Enjoy!


Spicy Orange Chicken Wings Ingredients (enough for about 5 lbs of wings):
2 big tablespoons Sambal, or other Asian-style chili paste to taste, or may sub red pepper flakes to taste
1 cup orange jam or marmalade, (strain if contains an excess of orange rind pieces)
1/3 cup rice vinegar
1/4 cup hoisin sauce
1 tablespoon soy sauce
Suggestions for optional additions:
finely minced garlic cloves
finely grated fresh ginger, optional
minced green onions
toasted sesame seeds

Wednesday 19 January 2011

Crunchy Rice Bars Recipe (Vegan)


With Sam's food sensitivities, it is impossible for me to find a packaged cereal bar to purchase. The two main problems are oats and/or evaporated cane juice present in almost all of the bars I've seen. So I decided to make my own cereal bars for Sam. I wanted something crunchy like a granola bar, using crunchy rice cereal as the base. I also didn't want it too sweet. The recipe I came up with is exactly what I've been looking for all of these years. The best part is that Sam loves them!

Crunchy Rice Bars Recipe

1-1/2 cups of Enjoy Life Foods Perky's Crunchy Rice Cereal
2 tbsp honey or agave nectar
2 tbsp sugar
1 tbsp water
1 tbsp vegetable oil
1 tsp pure vanilla extract
1/8 tsp salt

Preheat oven to 275 degrees. Generously spray a cookie sheet with non-stick cooking spray.

Heat the honey, sugar, water, oil, vanilla, and salt in a small saucepan over Medium Low heat until the sugar melts and it starts to boil.

Remove the pan from the heat, add the rice cereal, and mix thoroughly. Pour the mixture onto the cookie sheet and use a spatula to spread it out into a rectangular shape. Use the spatula to press the cereal together so there aren't any gaps. The end result should be a thin rectangle without any gaps between the cereal. Bake it for 30 minutes.

When it is done, remove the cookie sheet from the oven and invert it onto a cutting board lined with wax paper. If the cereal bar doesn't come off in one piece, that's OK, just use your spatula to scrape off all of the cereal from the cookie sheet onto the wax paper, then repress the cereal into a rectangular shape before it cools off. While it is still warm, cut it into squares or small rectangles with a knife. As it cools it will become more and more crunchy, so you will not get perfect shapes (it will break apart like peanut brittle).

You can store the Crunchy Rice Bars in an airtight container, or you can freeze them (they freeze really well!). To freeze them, lay out the Crunchy Rice Bars in a single layer on a piece of wax paper that would fit in a large freezer bag (or tupperware container). If you have more than will fit on one sheet, put another piece of wax paper over it and start another layer. Cover the top layer with a piece of wax paper, then slide it in the freezer bag, seal it, and lay it in your freezer so that the pieces don't overlap. The Crunchy Rice Bars don't lose their crunch being frozen, and can be eaten right out of the freezer without thawing.

Oatmeal Raisin Cookie Recipe


Chewy Bakery Style Oatmeal Raisin Cookie Recipe

Chewy Bakery Style Oatmeal Raisin Cookies

Pureed raisins is the secret to a soft, chewy oatmeal raisin cookie recipe. Although I love my other oatmeal raisin cookie recipe, the real butter in this one has totally won me over...for now! (A funny little German baker once told me that "cookies are like men, even when they are good, there's always room for improvement. Ha.)


Raisin Puree: Oatmeal Raisin Cookies Best Friend

Well...this oatmeal raisin cookie recipe doesn't have much room left! They're soft, chewy, with the perfect amount of sweetness and THAT BUTTER.... my oh my that butter. Butter really does make everything taste better huh? Damn you butter for being so good to my taste buds, yet so unfair to my thighs and gut.!! DAMN YOU I say!!!!


So soft and chewy!!
Anyway, it's no surprise the level of richness and creaminess that butter adds to this recipe. If you are an oatmeal raisin cookie lover, this recipe is sure to score high up there on your favorite list. Once again, my raisin-hating husband shamefully agreed to loving these cookies! lol

Watch me make this oatmeal raisin cookie recipe from start to finish!!


Ingredients:
2 cups all-purpose flour
1 teaspoon baking powder
1 teaspoon salt
1 teaspoon baking soda
1 cup butter, softened (please do not melt the butter)
1 cup brown sugar, packed
1 cup white sugar
2 eggs
1 teaspoon vanilla extract
1/3 cup water
1/2 cup raisins
3 cups 1-minute oats
1 cup raisins


*recipe update*
I now add in 1/2 teaspoon of cinnamon and I stir the blended raisin mixture in with the wet ingredients. 


Bake on center rack in 350 degree preheated oven for  8-9 minutes.

*Make sure that the butter is softened and not melted or you'll have a flatter cookie (like mine, although they will still be delish)
*Once you add the flour mixture, only stir until the ingredients are combined. If you over-stir, you will have a tough cookie on your hands. We want soft & chewy, not tough.
*Cooking times may vary so watch that first batch carefully. Take the cookies out of the oven when they are still slightly undercooked. Allow them to finish cooking on the baking sheet for a few minutes before transferring them to a cooling rack to finish cooling. This will ensure that your cookies STAYS moist, soft and chewy!

Coming Soon: Panda Wings?

I'm about to air a video for, "Panda Wings." As the name suggests, this will be another fabulous addition to our award-winning collection of chicken wing recipe videos. The "panda" part comes from the fact that the spicy orange glaze you see glistening here, is inspired by the most popular entree at the popular Chinese fast food chain, Panda Express. 

So, can I use this name? Will I get letters from their lawyers? Are you a trademark attorney, or at least play one on the Internet? I'd love to hear what you think!

Tuesday 18 January 2011

Instant Mashed Potato Pancakes – Made from the Other Kind of Leftovers

I loved seeing mashed potatoes at the dinner table growing up, not only because I loved mashed potatoes, but also because it meant my mother would be using the leftovers to make fried mashed potato pancakes.

These were nothing more than cold mashed potatoes, shaped into patties, and browned in butter. I loved them, and use that same trick to this day. The potato pancakes you see here were born from ano
ther kind of leftover potatoes…the end of a box of instant potato buds.

I'd used them while testing the crispy onion rings recipe, but didn't want to keep such an unsightly container in my pantry (you never know when some other celebrity food blogger is going to drop in to borrow a cup of foie gras), I decided to see what would happen if I
used it, uncooked, in a potato pancake mixture. What happened were four crispy, buttery, perfectly decent potato pancakes!

One advantage this version has over the freshly mashed one is those contain milk and butter, which makes it much harder to hold together when fried. I'm not saying you should just switch to instant, but I felt like I had to find some shred of a culinary advantage.

Logistically, this would be perfect for backcountry camping, or your friendly neighborhood college dormitory for obvious reasons, not the least of which is its cheapness and shelf stability (and by "shelf," I mean an old milk crate, turned on its side).

So, if you have some instant potatoes in the pantry, maybe consider giving this a try. Otherwise, remember this the next time you do find yourself in a similar situation. I mean, who would go out and buy a box just to specifically make a batch of these crispy, crusty, delicious patties? Enjoy!


Ingredients:
1 cup cold water
1/2 teaspoon salt
1 egg, beaten
3/4 cup Betty Crocker Potato Buds (probably will work with any similar brand)
fresh chives
freshly ground black pepper
cayenne to taste
1 tablespoon vegetable oil
1 tablespoon butter

Monday 17 January 2011

Chick-O-Sticks!!!...don't ever leave me again!!! You had me worried sick!!


My FAVORITE Childhood Candy


Reunited & It Feels So Good!!

I found it yall!!!!!! OMG I feel like Charlie with the Golden Ticket right now!!! I've got it right here in my hands! I can feel the power!!!!


If you follow me on twitter and facebook then you know I've been on a search for the past few months to find my favorite childhood candy, the oh-so-tasty,
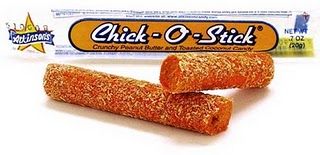
 Chick-o-Stick!!!

{Fond photos of me posing with a Chick-o-Stick coming soon!!!}

I still remember the first day I laid eyes on this lovely candy stick. My mother bought it for me as a treat for doing good in school. We were not allowed to eat much candy growing up so when we did get candy it was like, a big deal!

I kept taking tiny bites, wrapping it up, and sticking it up under my mattress (uh...yeah. It lasted for months. yeah I know.) because I wanted to saver it and didn't want any of my siblings to find it. LOL

Ahhhh that sweet, crunchy, crispy,  chewy, orange, peanut-ty flavored log, rolled in fine coconut. Some people call it a chocolateless butterfinger. I call it the stuff my childhood is made of!!


Anyway, like I said, I FINALY FOUND THEM!!!!! Thanks to my fabulous candy-loving readers who hipped me to their location...DOLLAR GENERAL and to my wonderful cousin Quanna who pin pointed the exact Dollar General location in my area!!!!!

I saw them as soon as I opened the door and yes a big smile came on upon my face!!

There they were, arrange so neatly in a case. It was packed in that store and I'm sure those  people in line were probably thinking "wow, really? Is it that serious?" to see me smiling that hard while heading straight to Chick-o-Sticks, slowly saying "Chick-o-sticks" while admiring them.

I decided to get just one. Of course the foodie in me wanted to get a handful so that I could stash some in case Dollar General decided to play a cruel joke, but I resisted.

I just have this one chick-o-stick. And as I type this blog post, I'm taking teeny tiny bites and appreciating every moment!


Did you know:


Chick-O-Sticks has been manufactured since The Great Depression.


A sugar-free version of chick-o-sticks are also available

Chick-O-Stick's original wrapper featured a chicken wearing a cowboy hat and a badge in the shape of the Atkinson logo. 


The chicken was done away with when people were often confused over whether the Chick-O-Stick was candy or a chicken-flavored cracker. The Atkinson Candy Company says that the chick-o-stick resembles fried chicken and that's really how it got it's name. (uggghhh...what kinda fried chicken are they eating???)


P.S. If you ever want to make me happy, just send me a Chick-o-Stick.  Not now though, I'm on a "lose my gut in 4 weeks" diet. Wait until the fall-winter holiday season when I proudly welcome the muffin-top look.

Next time you're at the store buy a chick-o-stick, just one!
I swear it's fun to take tiny bites.